
I hear it constantly, “I just got a new set of forks on my mountain bike.” I hear it and cringe. A set of forks? Any spoons or butter knives with your forks?
Regardless of the type of mountain bike you have, there are specific names for the parts of the bike frame and components. It isn’t uncommon to hear mountain bikers referring to the parts of their mountain bikes by incorrect names.
Especially if they are new to mountain biking.
At the very least, knowing the correct names of the parts of your mountain bike and its components makes for a quicker YouTube search when you have an issue.

Mountain bike frame
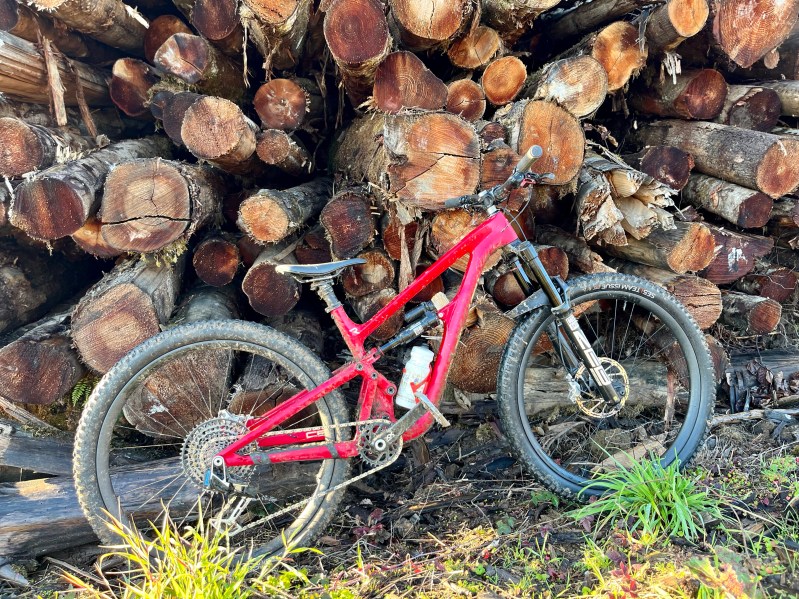
Your mountain bike frame can be broken into two sections—the front triangle and the rear triangle. This is especially true if you have a full-suspension mountain bike, as you can literally separate the two ends.
These two triangles are each made up of multiple tubes, welded or formed together, depending on the actual material of the mountain bike frame. And as you can imagine, each of these tubes has a different name.
In this section, I will not discuss all the rocker arms and linkage that make up the rear suspension. While linkage and rockers exist on nearly every full-suspension mountain bike, each suspension design differs. The parts discussed in this article are consistent from bike to bike.
Front triangle
Three main tubes make up your mountain bike’s front triangle—the head tube, the top tube, and the down tube.
- The head tube is the very front of your mountain bike frame, just beneath your handlebars. It houses the headset bearings and steer tube of your fork.
- The top tube extends from the top of the head tube and runs back toward your seat, connecting again at the top of the seat tube.
- The down tube, sometimes called a bottom tube, mirrors the top tube, running from the bottom of the head tube to the bottom of the seat tube, turning into the bottom bracket housing.
Rear triangle
The rear triangle is composed of two tubes. These tubes essentially connect at the seat post, but on a full-suspension mountain bike, linkage and rockers actually connect the tubes.
- The chainstays essentially come from the bottom bracket housing and run straight back to the mountain bike’s rear axle. The chain on your mountain bike goes around the chainstay on the drive side of your bike.
- The seatstays are just above the chainstays on either side of your rear wheel. They intersect with the chainstays at the rear axle and run up near the top of your seat post.
In between
The seat tube is where the front and rear triangles meet on your mountain bike. The seat tube is directly under your seat and houses your seatpost. At the bottom of the seat tube is the bottom bracket housing. This holds the bottom bracket and bearings, an essential drivetrain component.

Mountain bike suspension
Two main components make up the suspension on your mountain bike. First is the fork. The fork is the front suspension on your mountain bike. It is a fork—singular—not “forks,” despite many using the term, and certainly not “front shocks.”
A mountain bike fork is made up of many intricate parts—two of the main parts worth mentioning are the stanchions and lowers. The lowers house the stanchions, among all the other parts of the fork. The stanchions connect the fork’s lower to the fork’s crown.
If your mountain bike is a hardtail, this is where this section stops. But if you mountain biking on a full suspension, you also have a rear shock or shock. If you use the term “shock” in a bike shop, the mechanics will assume you are talking about the rear shock.
The shock’s job is to absorb impacts on the trail, both big and small. Shocks also help provide traction for the back end of the bike.

Mountain bike drivetrain
If you’ve consumed mountain bike content on The Manual, you’ve likely heard the term “drivetrain.” If you have wondered what this means, you’re not alone. Essentially, the drivetrain has everything to do with your gears and the mechanisms that change them.
Here’s everything that makes up your drivetrain.
- The cassette is all the individual gears, or cogs, on your mountain bike and is attached to the rear hub of your wheel. In recent years, drivetrain manufacturers have bumped the number of cogs to twelve, ranging from around ten teeth in the highest gear to 52 teeth in the lowest.
- The derailleur hangs out with the cassette and is the mechanism responsible for moving the chain from one cog to the next. The derailleur is connected to a shifter (not pictured) on the handlebars.
- The chainring is the other “cog” on the mountain bike. This is connected to the bottom bracket at the bottom intersection of the front and rear triangles.
- The chain is likely the only part of the drivetrain that is not misidentified. It goes around the chainring and cassette, connecting the drivetrain.
- The crankarm, crank, or cranks, when mentioned together, hold the pedals. One crankarm is fixed to the chainring and propels the mountain bike forward as you pedal.
- The bottom bracket is the mechanism that connects the crankarms, allowing for pedaling and propelling the mountain bike forward.

Mountain bike wheels
The word “tire” is often used to refer to a wheel. Tires and wheels are different, and a wheel actually has several parts that make it up.
- The wheel, or rim, is the metal or carbon fiber hoop that the tire sits on. Modern mountain bike wheels are tubeless, similar to cars, and use tire sealant rather than innertubes.
- Spokes connect the wheel to the hub. If building a wheelset, make sure your wheels and hubs take the same amount of spokes—usually 28 or 32.
- The hub is in the center of the wheel. It houses bearings and, if it is the rear hub, a ratcheting system that engages the cassette. The front and rear axles go through the hubs.
- Tires are probably what we are most familiar with, yet many still call the “wheel” a “tire.” Tires come in different sizes and tread patterns. Your local bike shop has good suggestions for what set of tires best matches the terrain in your area.
There you have it, the meat and potatoes of mountain bike labels. Now that you know, you have no excuses.
Editors' Recommendations
- Do you think you should be better at mountain biking than you are? These 3 things could be holding you back
- This company is making airless bicycle tires with materials originally designed for NASA’s Mars Rover
- The best electric bike options to make your commute or adventure greener
- The new Insta360 Ace Pro looks almost exactly like a GoPro, and has specs to match
- 3 expensive mountain bike upgrades that are worth the splurge


