
One of the most frustrating things I see all the time on the trail is badly packed backpacks. You pass a group of otherwise capable-looking hikers, only to see that their packs are bent out of shape, their gear is hanging out everywhere, and they’re being pulled all over the place by their poor weight distribution. You want to stop and help them, but is your unsolicited advice welcome, or will you sound like a hiking snob? Perhaps it’s in the delivery, but surely they can’t be comfortable.
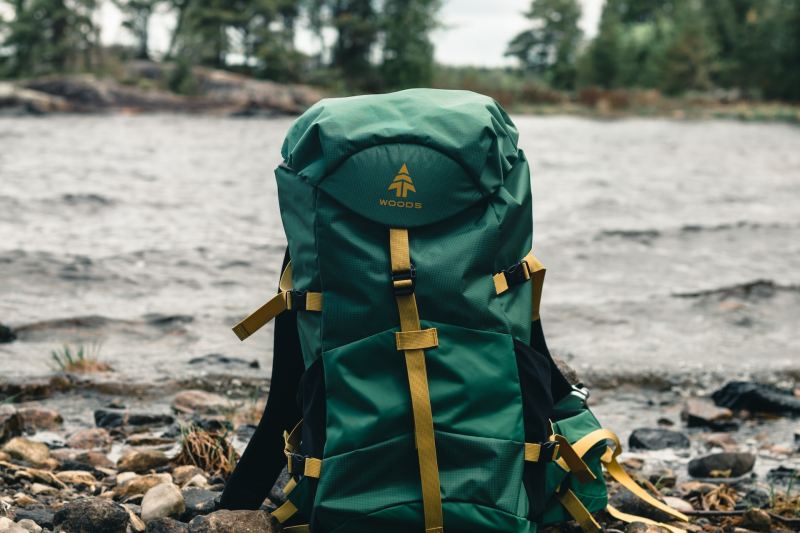
Packing a backpack is an art form. Once you have your packing down, it becomes therapeutic to piece your puzzle together in a way that fits perfectly and comfortably and means that the hiking backpack you bought with the expensive back system actually works like the label promised. This might sound like too much excitement just for packing, but trust me, once you learn how to pack a backpack properly, it becomes second nature and allows you to hit the trail so much more comfortably. So, how do you do it?
Essentials vs. luxuries
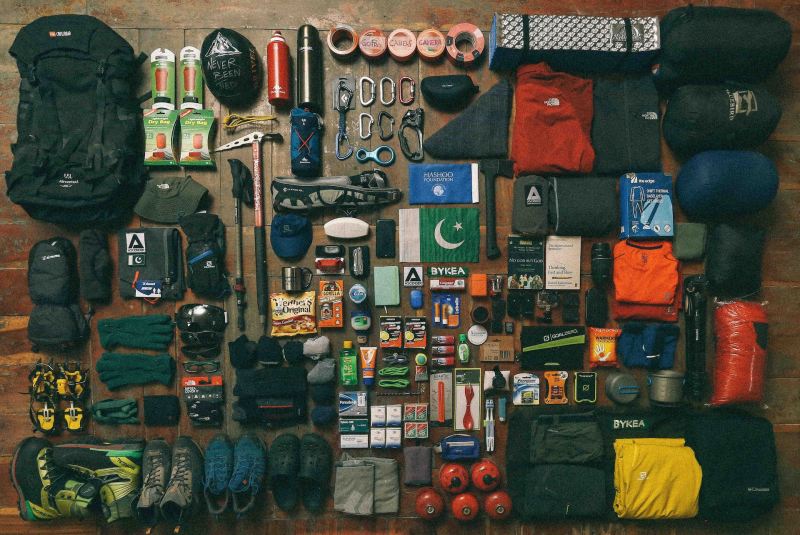
There are items you simply can’t go trekking without. These include your sleeping system — a camping tent, sleeping bag, and sleeping pad, as well as food and usually a stove. Then you need spare clothing, a waterproof jacket and pants, and space for a water bottle and purification system. It’s worth writing yourself a backpacking checklist for the first few hikes and adjusting it to suit you.
Then there are luxury items. These might be your current book, some luxury food, or perhaps a lightweight camping chair. Sure, it’s great to have these items, but you can pack them around or after the essentials. This might mean you pack your bag, then unload certain items to fit in some more luxuries, all while keeping the balance comfortable.
Pack with a purpose – but keep those essentials close at hand
You’re going to be hauling your hiking backpack for up to 10 hours every day, potentially for up to two weeks. If it’s not packed comfortably, or you’ve got the weight all wrong, you’re going to know about it, and it’s going to cause you issues. You should prioritize comfort when packing, but also remember that this is your camping backpack; you’re going to need different items at different times. This means you need to balance the need for certain items closer to the top of your pack against having to have the weight in the right places. I recommend you prioritize weight distribution, and I’ll explain why.
A bag with poor weight distribution, no matter how convenient, is going to cause you injury and aggravation on your hike. Whether it’s pulling away from your back because the weight is too far back or pulling to one side, it’s going to hurt. It might seem logical to put all of your heaviest items in first and then load up with lighter items, but there’s a better way. By keeping all the heaviest gear in your bag close to your back, you alter your center of gravity less. This allows you to move more naturally on the trail — especially important on more technical ground — and prevent injuries like rolled ankles.
The first items to pack into your overnight backpack should be the last things to come out at camp. Conveniently, this also tends to fit with the desired weight distribution — great, huh? This means starting with your sleeping bag, then the majority of your food, your stove system, and your tent. This area can also include your sleeping mat, but these tend to fit well as “filler” space elsewhere. Spare clothing is generally lighter and can go further from your body. At the top of your bag, or in external pockets, put the things you might need on the trail. This is your waterproofs, your trail snacks, a small first aid kit, a spare warm layer, and your water bottle — unless you have a specific pocket for this.
Also, heed my plea here — don’t hang things off the outside of your pack. Please. That mug might not annoy you at first, but once it’s been tapping your bag for 8 hours, you — or, more likely, your hiking buddy — will want to hurl it into the bushes. And don’t even get me started on water bottles. Do you really want a liter of water bouncing against your backpack all day? I’ll tell you. You don’t.
Use compression packs and dry sacks
Compressing your gear isn’t going to make it any lighter, but it is going to save you loads of space. Smaller packs sit closer to your back and don’t pull you around in the same way. Also, the mental strain of lifting a 70-liter bag, even if it’s the same weight as your 50-liter bag, will make it feel 20 pounds heavier each time. Everyone is jealous of the well-packed 50-liter backpack, and with compression sacks, you can be the envy of the trail.
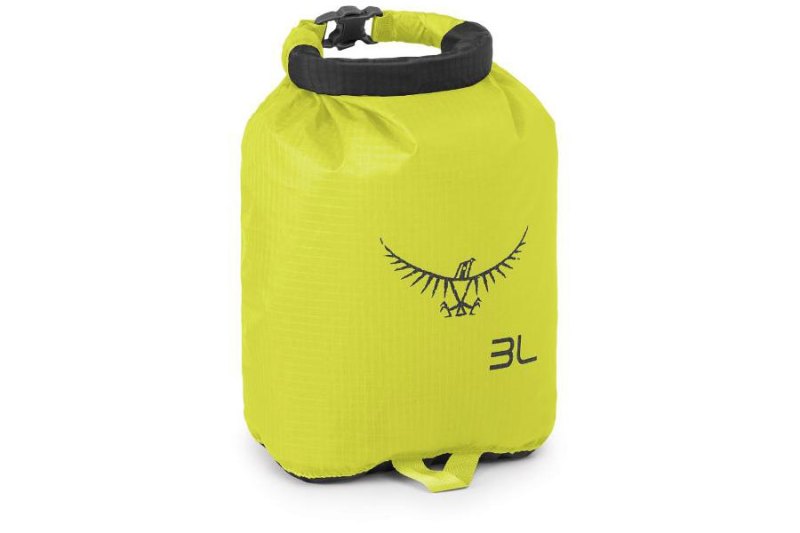
Compression sacks don’t come cheap, though, and most people find that the best middle ground is to use small dry bags. So long as your dry bags are watertight and airtight, you can load them up, squeeze the air out, and you’ll have your own DIY compression sacks. This has the extra effect of waterproofing all your gear. Let’s face it, anyone who has used a backpack cover knows how frustrating they can be.
Don’t just use a single dry bag for all your gear. If you ask any of the experienced trekkers you meet along the way how they pack their gear, you’ll find most of them pack compartmentally. This means packing gear into multiple smaller dry bags and then fitting them into your pack like a game of Tetris. You get bonus points here if you use sacks of different colors. That way, when you reach camp, you can easily tell which dry bag your tent is in, so you don’t parade around your spare underwear accidentally.
Get yourself a routine and stick to it – if it works
We can’t stress how important this is. It’s really easy to pack your trekking bag while you’re sitting at home, excited to hit the trail and deciding whether to pack two or three extra chocolate bars for each day. But once you’re four days deep and soaked to the bone, your patience for packing will begin to wear thin. In these situations, dig deep inside you and make sure you pack your bag as you did on day one — unless you got things drastically wrong, of course.
That way, you’ll always have your items exactly where you expect them to be. There’s nothing worse than getting into camp late to find that, in your morning rush, you buried your headlamp at the bottom of your pack. Take your time to pack, and repack if your bag sits wrong. A well-packed bag will barely notice on the trail, while a badly packed bag will exhaust you, both physically and emotionally.
Best materials for light packing
In today’s day and age, there is no reason why you should be hauling around heavy metals, cheap plastics, heavy glass, or stainless steel. Many outdoor brands have boiled down light packing to a science, adjusting their product lines to reflect this value. If you currently pack items with heavy materials, consider other options. Here are some materials to keep an eye out for:
- Silnylon or dyneema composite fabric (DCF). Tents or packs made of these materials are strong, durable, and lightweight, which makes them perfect for backpacking.
- Down or synthetic stuffing. Opt for a down-filled or synthetic sleeping bag or jacket, depending on your budget. Down bags are usually lighter and more compressible, while synthetic bags perform better in wet conditions.
- Aluminum or titanium. I beg of you, don’t bring your stainless steel or silver cookware/utensils.
- Plastic and silicone. High-quality plastic and BPA-free silicone are great for water bottles, food storage containers, and collapsible kitchenware.
Remember to carefully research and compare different products to find the best balance between weight, performance, and cost. Prioritize items that are essential for your safety and comfort during the hike, and always test your gear before embarking on any extended trips.
Editors' Recommendations
- Mountain bike gift guide: 12 fantastic ideas for the mountain biker in your life
- Camping with a CAN-AM Spyder RT taught me a lot about packing, motorcycle camping, and life on 3 wheels
- Snowboard boots gift guide: Our top picks from Burton, ThirtyTwo, Vans, and more
- The new Insta360 Ace Pro looks almost exactly like a GoPro, and has specs to match
- Legendary outdoor brands Ball and Buck and Luminox combine for the ultimate field watch


